Have you ever stared at a hole or crack in your drywall, unsure how to fix it? Learning how to repair and patch drywall like a pro can save you both time and money. Whether it’s from a doorknob bump or a nail hole, drywall damage can be an eyesore. In this blog post, we’ll guide you step-by-step through the process, ensuring you tackle these issues with confidence and achieve professional-looking results.
Essential Tips for Repairing and Patching Drywall Like a Professional
Repairing and patching drywall might seem challenging, but with the right approach, you can do it like a professional. Follow these simple steps to achieve smooth, flawless walls.
1 – Assess the Damage
Before jumping into repairs, assess the damage to determine the necessary approach. Small holes, such as nail or screw holes, are easier to fix compared to larger ones. For smaller holes, you may only need spackle or lightweight filler. Larger holes might require drywall patches or replacement pieces.
2 – Gather the Right Tools
To repair and patch drywall like a pro, it’s essential to have the right tools on hand. Common tools include a putty knife, drywall saw, sandpaper, spackle, drywall tape, and a utility knife. Having everything ready ensures a smooth and efficient process.
3 – Preparing the Surface
Before you begin, clean the damaged area. Dust, debris, or loose drywall can prevent the filler from properly adhering. Wipe the area with a damp cloth and make sure it’s dry before starting the repair.
4 – Patching Small Holes
For small holes, apply a layer of spackle using a putty knife. Smooth it out, ensuring the surface is even with the surrounding wall. Let the spackle dry for the recommended time (usually a few hours), then lightly sand it down to remove any excess material. Repeat if necessary for a smooth finish.
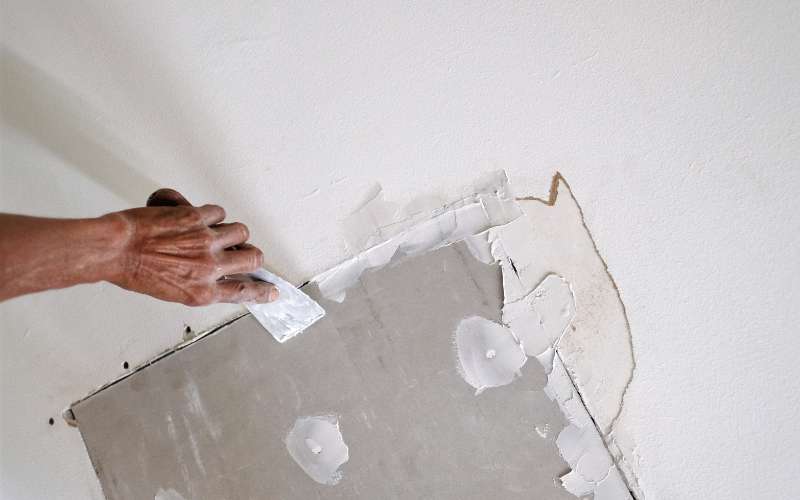
5 – Repairing Large Holes
For larger holes, you’ll need to cut a piece of drywall that fits the size of the hole. Secure it in place with drywall tape or mesh. Apply joint compound over the tape, smoothing it out with a putty knife. After the compound dries, sand it down for an even surface. Depending on the size of the repair, you may need to apply additional layers of compound.
6 – Sanding and Finishing
Once the patched area has dried, lightly sand it to create a smooth surface. Be careful not to oversand, as this could damage the patch. After sanding, clean off the dust and apply a coat of primer to seal the area. Finally, paint over the repaired section to match the surrounding wall.
7 – Prevention Tips
Now that you’ve learned how to repair and patch drywall like a pro, here are a few tips to prevent future damage. Use door stoppers to avoid doorknob dents, and be mindful when hanging items on the walls. For high-traffic areas, consider installing wall protectors.
Ready to Repair and Patch Drywall Like a Pro?
Now that you know how to repair and patch drywall like a pro, you can tackle any drywall issue with confidence. Whether you’re fixing small nail holes or larger patches, the process is straightforward with the right tools and techniques. If you need expert help or have more questions, feel free to contact us today for professional assistance. Let’s get your walls looking flawless!